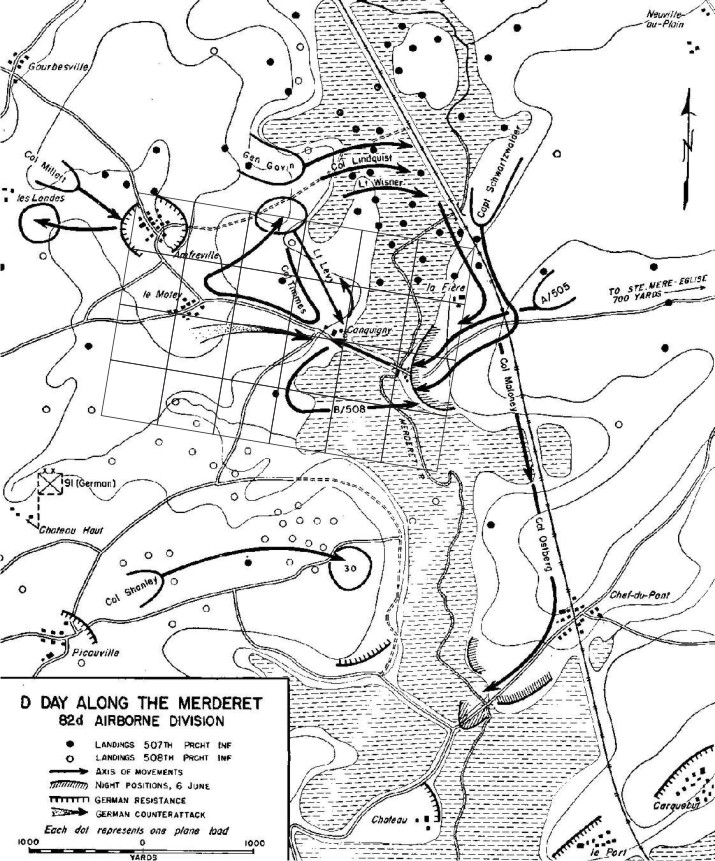
As mentioned earlier, the Butchers of the Bell Curve group decided to put on a bit of D-Day gaming and on Friday night June 7 of this year gamed the German attacks are Le Fiere against the 82nd Airborne. Hopefully everyone can read the background from the earlier posts and we can get straight onto the actual game report.
First we have the actual game area with a 6x4 table grid shown overlaid...
... and what the table looked like once we had remembered just how quickly a 6x4 table can eat up every terrain piece in the gaming room. Causeway and flooded area to the far end of the table. Pz.100 is shown in their game starting position in the foreground about to enter Le Moley (bravely defended by three stands of chickens). Out of shot to the left is Amfreville which was defended for this game by a small German force. These Germans played no real part in the game and existed just to remind the US player the village was still hostile.
Mid left down the table is a group of trees representing the orchard in which Col Timmes and his force were located and eventually were forced back into. German infantry from 91st Division (1057th Grenadier Regiment?) are on the bottom right of the photo.
Game system is Battlefront (Fire and Fury)
. Ground scale is 1inch = 40 yards, each tank model is 2-3 vehicles and a stand is approx a squad. All US units in this game were classed as VETERAN, Pz.100 as TRAINED, 91st Division units as EXPERIENCED and the rather useless chickens as GREEN.

The battle progressed. Our brave trainee tank crews muscle their way down the road towards Conquigny which is currently defended by a very small force of paras that were historically 12 officers and men and is shown in the game as 2 stands. The trailing R-35 platoon (Old Glory models from memory) are about to be harassed with mortar fire from Col Timmes, probably as a direct result of someone (who shall remain nameless) playing Panzerlied MP3s via their tablet at about the same time. German infantry seen in this photo are the infantry platoons of Pz.100 consisting of more tank crew trainees. The platoon shown in a neat row against the hedgerow bravely spent the rest of the game in that position while the second platoon still on the road managed to advance further up the road for later glory.

Meanwhile, B company 508th decide to cross over to the west side of the river. Historical this company did not seem to be aware the Germans were currently attacking and arrived in some confusion in Conquigny before being forced south of the causeway and eventually back across the flooded area. In game this was represented by rolling an attack, modified down just enough to ensure no one would actually die, and applying the Disordered and Suppressed results. These, together with a bad activation roll for this company next turn resulted in a rather unhappy bunch of paratroopers.
The causeway is actually tree lined on both sides, making the troops a lot less exposed as they appear in the photo. Casualty markers by Peter Pig.
B/508th starts to become engaged with Pz.100. The lead R-35 (Flames of War model) has already blown away the defending group of US officers using the awesome destructive power of the SA.18 37mm gun and about to start working it's way down the column of B company. This vehicle had a great game, eventually finishing with four kills and Iron Cross with Oak Leaves and Diamonds. Some nights the dice just love you...
The Peter Pig cavalry stand is representing the commander of the Pz.100 force, not because there is any evidence they owned any horses, but basically because AWB was pleased with the paint job and wanted an excuse to have it on the table.
Nearly at the end of gaming time. The Pz.III (Old Glory) has just been forced to retire down the road after an angry bunch of paras got into the wooded area next to it and threw grenades. Not seen is the increasing pile of dead in front of the lead R-35 who calmly blew away the troops attempting to close with it during the same turn. 91st Division can be seen approaching from the right. In retrospect from a scenario design point of view these troops may have started too far from the action as crossing the numerous hedgerows took most of the game.
To the left the forces of Col Timmes are attempting to work into a position where they can engage the pair of R-35s. The para in the woods just to the left of the road is dead man walking. Next turn it will be made disordered by the deadly fire of the Super R-35 (it had a REALLY good game) before being overrun by some of the trainee crew infantry. A solid barrage of long range bazooka fire would then disorder this vehicle (red marker - troops can rally from this condition under these rules) but by then we had run out of gaming time.
In all a very enjoyable time was had by the three players. It had been easily over a year since Battlefront had been played and there was some rust to shake off and remembering the effective range of some weapons took a while, probably resulting in some overly cautious moves at the start of the game. Positioning of the 91st units, as mentioned, was probably a bit too far away as they managed to do little in the game. As the expectation was that the low quality Pz.100 would be quickly broken and removed from play, AWB (as the scenario designer) took what was assumed to be the weakest unit in order to allow the other players the majority of the game play. Best laid plans of mice and bloggers...
Recreating historical events is also always a tricky balance, especially in a situation such as this where the staggered and unco-ordinated arrival of US units had a major influence on how the battle historically unfolded. Random dice were being used to attempt to have the arrival of US FOO and 57mm AT guns as well as A Company 505th. The support units were simply rolling for each stand hoping to get a suitably high result, where A Company was using a running total where the US player would add 1D10 to his tally each turn until the magic number of 20 was reached. In the game none of these events occurred although the mechanic seemed sound and brought no complaints.
Butchers of the Bell Curve are listing this game as a success and intending to game more WW2 in 15mm in the future.


No comments:
Post a Comment